Saturday, June 4, 2016

How to: Easily fix Windows 10 bugged explorer.exe

I like Windows 10.  For the most part it's a great OS.

However something about it bugs me to no end: explorer.exe

exporer.exe is what runs your task bar.

Mine is set to auto-hide.  Usually, it works.  Sometimes, it gets stuck and it refuses to hide and it's just taking up space on the screen.

The fix is to kill explorer.exe and restart it.

Another thing that it sometimes does, is when it is hiding, it STAYS hidden.  I think it crashed or something, because it never shows itself, the Windows key stops being functional, etc.

Again the fix is to kill explorer.exe and restart it.

I've been doing this manually for a while now, but I'm a developer so it pisses me off to do things manually.

I finally decided to learn PowerShell enough to do this simple task, and wow, I actually really like PowerShell.  Insert expletive here.  Good job Microsoft.

To make your life easier, here is the simple one-liner I made that will kill explorer.exe.  I saved this to a file named "reset.ps1" on my desktop, so now when explorer freaks out, I just right-click this and choose "Run with PowerShell" and voila!  Problem solved.

# Kill the explorer.exe process.
# Windows will automatically restart it. 
Stop-Process (Get-Process explorer).id

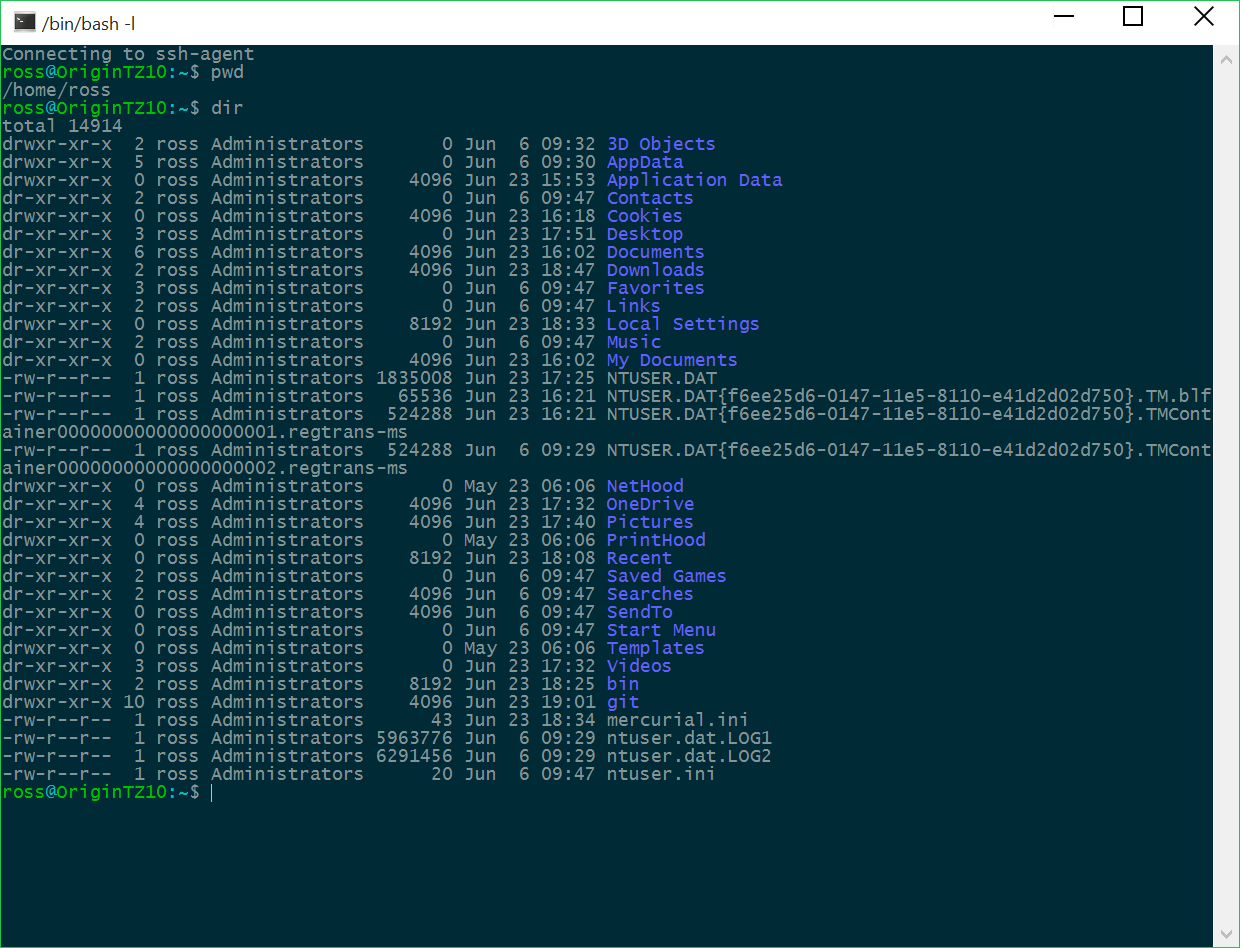
Screen-shot of my desktop, just choose "Run with PowerShell" and explorer.exe will be fixed!

Thursday, May 12, 2016

New Toy Arrived! 2016 Razer Blade

My new laptop arrived, the 2016 Razer Blade.  It was on back-order for a while but it's finally here!


And yes, that's my bed, and yes, it is covered with Stuff(tm).

My wife is REALLY excited to live with a mad scientist, as I'm sure you can understand.  Especially now that I'm in the middle of a hardware project - experimenting with GPU servers - and yet we live in this tiny apartment where there is not any room...

But there is a bed!  It makes a great work space if you ask me.


This is the current work-in-progress.

6 GPUs in a single server.  What a thing of beauty.  Well, it will be when I'm done with it anyway.  For now it's messy and it keeps freezing up, but it's getting there!


Friday, May 6, 2016

HowTo: Install and Set up a fresh Windows 10

I've done this a few times now, and I'm currently trying to help make it easier for developers I work with to move back to Windows from the increasingly irrelevant Mac platform.

All OS politics aside, hopefully this helps you install Windows 10 and set it up to be a nice interface for doing technical work.  The target audience is Mac and Unix users.

Over the past few years I have written up some other posts, and I'll link to them here and update them as needed based on my most recent experience.

1) Install Windows 10


Before you do anything, you need to install Windows 10 as a fresh install.  I'll let How to Geek tell you how to do that, their instructions worked perfectly for me.

How to do a Clean Install of Windows 10, the Easy Way

1.A) Update Graphics Drivers


The very first thing you should do after installing Windows 10 is update your graphics drivers.

I use nVidia cards, and Windows does install some basic drivers that support it, but they are not updated and they are missing many features from the official nVidia drivers.  (I'm a gamer, I do game things, I need official drivers).

1.B) Fix your username and home directory

[EDIT] There is actually an option to "skip this" when it asks for your Windows Live login on a fresh install.  If you click that, you can type the name of the local account you want there.  If you missed it, follow the steps below to fix your username to something you want.

One of the more annoying things about Windows 10 installs is that it is so user friendly.

It's so user friendly, that they do not give you the option to set up what username you want on the system, or what home directory you want to use.

For normal people this doesn't matter, but for tech people, especially people who need their name to be consistent across a network that includes Mac and/or Unix machines, this will not do.

For example Windows decided that my username was "rossd" and my home directory was going to be "C:\Users\rossd" -- but I am known as "ross" on every computer I own, and I expect to be known as "ross" on Windows 10 as well.

Here is a great post about how to fix this problem.

Read the reply from youssoufsawadogo on August 10, 2015.  He goes into detail about how to fix this.

After that one, you also need to read youssoufsawadogo's second reply on August 13, 2015 which include the final steps to complete the fix.

TL;DR

  • Switch to a local account
    • This lets you choose your new username (I chose "ross")
  • Edit registry to change your home directory path (I chose "C:\Users\ross")
  • Reboot
  • Manually rename/move your old home directory folder to the new place where you want it to be (I moved the unwanted "C:\Users\rossd" to the new "C:\Users\ross")
  • Reboot
  • Switch back to your Microsoft Live account
And the end of this ordeal:

My username = ross
My home dir = C:\Users\ross

1.C) Set your computer's hostname


WikiHow has a nice post:

How to Change Your Computer's Name (Host Name) on a Windows PC

1.D) Install Anti-Virus software


Install whatever anti-virus software you or your organization prefers.  We're about to download stuff from the Intervirusnettrojanwebs!

1.E) Install your motherboard manufacturer's drivers


To find out what kind of motherboard you have:
  • Install CPU-Z
  • Run it
    • On the "Mainboard" tab, note your Motherboard Manufacturer and Model
  • Search the Internet for drivers specific to your system
  • Only install drivers from sources you trust, and get only the latest versions of them
For example, mine is an ASUS Rampage IV Black Edition, and a quick search leads me to the ASUS drivers page for this specific model of motherboard.
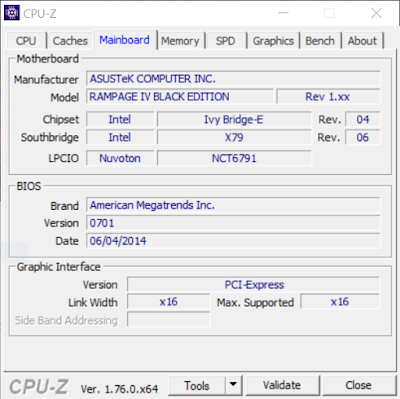


You will likely have a different motherboard, perhaps even a different manufacturer.  Make sure you install the right drivers for your hardware.

2) Install Basic Applications


Now that Windows is up, your user account is set up exactly how you want it and your video card is pumping out your sweet 4K or better resolution, you are ready to do stuff.

Almost.

2.A) Install Chrome


Install Chrome, then make sure you sign into it to sync all of your previous settings, bookmarks, etc.

Especially if you are coming from Mac, we don't use Safari on this side of the tracks.  It, like all other Apple software, totally sucks unless you're on a Mac.

2.B) Install Sublime Text 3


I'm not sure why Microsoft refuses to make a text editor that isn't crap.

But that's OK, we have Sublime Text 3.  Currently it's my favorite, and it works on Windows text files, Mac text files, Unix text files.  If you have a text file, this will edit it.

Make sure you Add to Explorer Context Menu when you install, it gives you a cool right-click "Edit with Sublime Text" option on all of your files, which will save you a lot of time if you like to edit files.

2.C) Install Dropbox


If you aren't using Dropbox, I'm not sure what century you are living in.

iCloud only works if you're on a Mac (surprise!).

Google Drive actually works pretty well no matter where you are, unless you're on an iShit device that makes it work poorly and which most Apple apps refuse to integrate with.

So Dropbox is the best option for cloud storage IMO, it has the widest range of support on all platforms from what I have seen.  (My info could be outdated, but I still use it anyway).

2.D) Install mSecure password manager


mSecure is a must-have app.  But not the piece of shit they have in the Windows store.  Make sure you get the desktop version I linked.

If you know all of your passwords, then they are not secure enough.  Even worse, if you don't have very many passwords, then all it takes is for 1 site you visit to get hacked and you are completely screwed.

I have memberships to 100s of forums, web sites, etc.  I use a completely unique, completely random password for each one.

As it is impossible to remember all of those, I use a password manager that keeps an encrypted database in the cloud (on Dropbox) which is easily shared across all of my devices.

This is optional, but I think it is foolish at this point in time to not use a good encrypted password manager, IMO you are just asking for trouble.

There are other good password managers, but mSecure works for all of my devices:  Win 10 desktop/laptop, Mac laptop, Android phone/tablet, iPhone, iPad.  When I started using it a few years ago, it was the best app that supported every device.

2.E)  Install Skype


Skype is broken quite a lot (come on guys!) but it's still very useful if you actually need to talk to people.

Since Facetime only works on Mac (typical stupid Apple) and Google Hangouts is virtually impossible to actually use (please guys, UI shouldn't be an afterthought), Skype it is.

2.F) Install 7-Zip


7-Zip is the best Windows zip program I have found, and many people are starting to use *.7z files instead of zip files.

I recommend that you install this to a custom location, because it is helpful (and required by some applications) to have 7zip.exe in your path.

I installed it to C:\tools\7zip

I also recommend allowing it to install the Explorer shell extension.  This means you will get a nice right-click menu option allowing you quick access to some 7-zip features without having to actually open the app up.

2.F.A) Add 7-Zip to your System Environment PATH

  • Windows key
  • Type "system env" and select the "Edit the system environment variables" option
  • Click the "Environment Variables..." button
    • In the System variables box, click the "Path" variable, then click the "Edit..." button
      • Click the "New" button
        • Enter C:\tools\7zip as the new path
        • Click OK
      • Click OK to close Environment Variables
    • Click OK to close System Properties

3) Set up Unix-live Dev Workstation


Now that you aren't feeling so naked, it's time to install some work tools.

Refer to my previous post:


How to install and configure SourceTree on Windows 10

SourceTree is an amazing tool to help you manage Git repositories.

If you are still running git by hand, you are insane.  Either that, or you haven't taken the time to try out SourceTree.

Since I code on both Windows and Unix, I need some special settings that make sure that git doesen't corrupt my files and start adding \r characters all over the place.

Seriously Windows, why do you still use the \r character?  It boggles the mind.

1) Install to C:\tools\SourceTree


You can choose any directory you want but I like shorter paths that don't have spaces in them for easier MinGW/MSYS compatibility.

1.A) Connect your Github account


During the installation process there is an option to connect your Github account, which you probably want to do.

1.B) DO NOT configure automatic line ending handling.


Make sure you UNCHECK "Configure automatic line ending handling by default (recommended)."

They should reword that as "automatically butcher all whitespace in your Mac/Linux source files" which is a much more accurate description of that that option does.


2) Configure SourceTree


Now start up SourceTree and let's configure it the way we want.

I've noted the main settings that I like to change, but you should look at all of the options and see if there is anything else you want to change while we're at it.

Tools -> Options -> General


  • Set up your Default user information
  • Make sure SSH Client is set as "PuTTY / Plink"
  • Set Misc / Project folder to your preference
    • Mine is "C:\Users\ross\git" which is the same as ~/git in MinGW/MSYS

Tools -> Options -> Git


  • Global Ignore List
    • Change this to be the gitignore_global.txt in your home directory
      • Example mine is "C:\Users\ross\.gitignore_global"
    • This way it will use the same file as your command-line git in MinGW/MSYS uses

3) DISABLE ANTI-VIRUS IN YOUR SOURCE DIRECTORIES


Make SURE you disable Anti-Virus in your source directories!

I added an exception in my Norton AV so it will NOT scan "C:\Users\ross\git" which is where I keep my source.

You should add an exception for every one of your source directories.

If you forget to do this, then every time you switch branches in git, your machine will grind to a halt.

Your AV sees that 1000s of files have changed, and it scans them all!  It literally makes branching and merging a nightmare.

So just disable AV in your source directories and save yourself some headache.

Updates


15-May-16 - Fixed path to .gitignore_global such that it matches the msys file.

Tuesday, June 23, 2015

PhpStorm settings

I like to use the following custom PhpStorm settings:

Global IDE Settings

  • Appearance & Behavior
    • System Settings
      - DONT reopen last project on startup
      - DONT confirm application exit
      - Open project in new window
  • Editor
    • Colors & Fonts
      • Font: Consolas 22pt (I have a 4K high DPI monitor)
    • Code Style
      Line separator: Unix
      Right margin (columns): 80
    • File Encodings
      Project Encoding: UTF-8
  • Languages & Frameworks
    • PHP
      PHP Executable: C:\dev\php\php.exe
      • Composer
        Path to composer.phar: C:\dev\bin\composer.phar

Per-Project Settings

For every project, it's also necessary to set up PHPUnit.

Note that I configure PHPUnit as a composer dependency, so each project has its own local copy and version of PHPUnit.

This removes the requirement that PHPUnit be installed on the system externally, but it also means that we have to configure PhpStorm when we first open the project.  That is the lesser of 2 evils IMO so that's what I'm doing.

Project Settings

  • Languages & Frameworks
    • PHP
      • PHPUnit
        Use custom autoloader
        Path to script: (current_dir)/vendor/autoload.php
        Default config file: (current_dir)/phpunit.xml.dist
        Default bootstrap file: (current_dir)/test/bootstrap.php

 Run > Edit Configurations

  • Defaults
    • PHPUnit
      • Test scope: Defined in the configuration file
      • Use alternative configuration file: (current_dir)/phpunit.xml.dist
      • Custom working directory: (current_dir)/test

HowTo: Set up Win 10 as a Unix-like Dev Workstation

I recently installed a brand new Win 10 preview and set up my Unix-like dev environment on it.

This post basically ties together some of the other posts I've made in the past.  I'll keep this updated as I add steps when I install stuff again in the future.

When you're done with this, you'll have a MinTTY window (like xterm) that looks and acts cool.  Here is mine:


Setup Procedure:

  1. Install MinGW-W64+MSYS
  2. Reboot (May or may not be needed; I couldn't get MsysGit to install without rebooting, but I have Win 10 Preview which is probably buggy).
  3. Install PuTTY/Pageant on Win 10
    1. Configure MinGW-W64+MSYS to use PuTTY Plink/Pageant
  4. Install MsysGit for source control
  5. Install SourceTree
  6. DISABLE anti-virus from running in your source code directories, otherwise when you change branches, it's slower than molasses as your AV is scanning every one of your 1000s of "changed" files every time you switch.
    1. My AV has a way to add directory exceptions, if yours doesn't, you should upgrade
  7. Set up home directory dotfiles
    1. See this Github repo which contains my files.  I recommend you copy these to your homedir and then make whatever changes you want.

Make Git play nicely with Unix/Mac


We MUST ensure that Git does NOT try to auto-convert line endings.

Auto-fuck-up-line-endings has all kinds of horrible side effects, and it is totally unnecessary as long as you use modern text editors that don't care what the line endings of a file are.  (JetBrains has awesome IDEs, pay for a good one and call it a day).

In a MinTTY window run these commands:

git config --global core.autocrlf false
git config --global core.ignorecase false

The second command, core.ignorecase = false, means that if we rename a file from "foo" to "FOO", we will commit that name change to Git.  Usually Windows ignores that since its file system is case-insensitive, but that is the exception rather than the rule, as far as OSes go.

PHP Development Setup


  1. Install PHP
    1. Install PHP YAML extension
  2. Install PhpStorm
    1. I installed it to D:\Apps\PhpStorm
    2. Customize PhpStorm default settings

Python Development Setup


  1. Install Python 2.7.x
    1. Install to C:\dev\python
    2. MANUALLY add to SYSTEM path, if the Installer didn't do it:
      1. C:\dev\python
      2. C:\dev\python\Scripts
    3. Install PyYAML
    4. Install Jinja2
    5. Install setuptools
  2. [optional] Install PyCharm GUI
    1. I installed it to D:\Apps\PyCharm

Google Cloud Setup


  1. Install Google Cloud SDK via Windows Installer
    1. Install to C:\dev\gcloud
    2. Start the SDK shell
      1. Run: gcloud auth login

Edits


12-May-2016 - Install PuTTY before msysGit

10-May-2016 - Updated Python install instructions.

06-May-2016 - Added post specific to SourceTree.  Added pertinent homedir dotfiles to a public Github repo so you can copy them.

Install PuTTY\Pageant on Win 10

Install PuTTY/Pageant on Win 10


[Optional] Copy existing .ssh directory from Mac or Unix.


If you already have an .ssh directory from Mac or Unix (or another Windows machine), then copy it to your home directory now, if you haven't already.

You should include your SSH keys, configs, etc.

It's a pain getting Windows to name a directory ".ssh" with a leading dot, but if you have installed MinTTY already then you can just open a MinTTY terminal and rename it to ".ssh" which is required before we move forward.

Install PuTTY


Download the PuTTY installer from the official (if strangely 1995 looking) site

http://www.chiark.greenend.org.uk/~sgtatham/putty/download.html

Install it into C:\tools\PuTTY

Set up Pageant to run at Startup


Open Windows Explorer and navigate to
%appdata%\Microsoft\Windows\Start Menu\Programs\Startup

Create a new Shortcut:

  • Target: "C:\tools\PuTTY\pageant.exe" id_rsa.ppk second.ppk third.ppk
  • Start In: "%HOMEPATH%\.ssh"

Notice:

  • You can pre-load as many keys as you want.
    • In the example above, id_rsa.ppk is the primary key, and it also loads 2 more keys: second.ppk and third.ppk.
    • Remove second.ppk and third.ppk from the Target line, and replace them with whatever other keys you want loaded (if any).

Make sure it works by executing the shortcut.  You should see Pageant start, and it should prompt you to enter the password for you SSH key.

Edits


06.May.16 - Changed the install location to C:\tools which is more reasonable to use in the path if so desired.

Install MsysGit on Win 10 (for Unix Developers)

Download Msysgit.

Install to C:\dev\git

Keep all the default installation options

Choose "Use Git from the Windows Command Prompt"


Have Git use Plink from PuTTY


Make sure Windows does NOT mess with line endings.  Leave them alone.


The reason for this, is sometimes we compute file hashes, like PHP Composer for example, and if there are \r characters in the file then Windows computes the hashes differently than Unix, which is stupid.

For this to work, you must use a decent text editor that understands that there are many ways to end a line, not just \n\r.

Voila!  You now have Git, and it is configured correctly for cross-platform development.

Updates


10-May-16: Updated line endings option - NEVER automatically change line endings!  This way you get full control over line endings from your editor.  So if your line endings are messed up, it's your own fault, and you can easily fix it.

Monday, May 11, 2015

Installing MinGW-W64 + MSYS on Win 10 x64 (or Win 8.1 or Win 7)

(This is a repost of something I did last year, I accidentally deleted it from Blogger).

Update:  I installed this on Windows 10, and updated the procedure based on experience since the original post.

I'm a Unix/Mac guy.  I use Windows for gaming but I've never really developed on it before, because why.

When I did transition to windows relatively recently for development, I used cygwin, which worked pretty well and was Unix-like enough for me to be OK with it.  However I can't make Windows apps in cygwin, and now needing to do some prototyping for cross-platform Windows tools, I need MSYS instead of Cygwin.

After a few attempts at doing this, reading various blogs that all say to do it different ways, and not really knowing which pre-compiled code I can trust versus not trust, here is a methodology I'm happy with and generally feel is relatively safe to install.

After following this procedure:

  • MinGW (64-bit) will be installed to C:\MinGW-W64
  • MSYS (32-bit) will be installed to C:\msys

    • MSYS will use your Windows Home directory as its own.

  • You'll have a "MinTTY" shortcut to start a mintty terminal running a bash shell
  • (Windows will now feel very similar to Mac/Linux)

Download/install MinGW-W64

Go to http://sourceforge.net/projects/mingw-w64/

Download the latest installer and run it.  Choose these options:

Version: (choose the highest)
Architecture: x86_64
Threads: win32
Exceptions: seh
Build revision: (choose the highest)

Install path: C:\MinGW-W64

Note here we're using win32 threads, NOT posix threads.  On Windows, win32 threads apparently run much faster than posix.  This means that when you compile things from MinGW you must ensure that you choose the win32 thread options or you'll likely have problems compiling.

NOTE: If it fails to install (sometimes it cannot download the toolchain) then that's fine, just ignore it for now and move on to below, updating the toolchain.

Download/install MSYS

Go to http://sourceforge.net/projects/mingwbuilds/files/external-binary-packages

Download the latest revision.

Unzip to C:\

This creates the location C:\msys

Create a directory for mingw

Using Windows Explorer, navigate to C:\msys and create a new folder named mingw.

The full path of the new folder you created will be C:\msys\mingw

Don't put anything in this folder.  Leave it intentionally empty.

Mount /mingw for MSYS

Edit C:\msys\etc\fstab

It should contain (at the very least) these lines:

#Win32_Path           Mount_Point
C:/MinGW-W64/mingw64  /mingw


I also recommend that you mount your Windows homedir to /home/yourname, so that your total fstab will look like this:

#Win32_Path           Mount_Point
C:/MinGW-W64/mingw64  /mingw
C:/Users              /home

Make sure there is an empty line at the end of the file.

* If you opened any msys consoles, close them now and reopen them.

Download/install YASM


Download the latest "Win64.exe" file, for example something like http://www.tortall.net/projects/yasm/releases/yasm-1.3.0-win64.exe

Move the downloaded yasm-1.3.0-win64.exe to C:\msys\bin\yasm.exe

Configure a decent Terminal

You now have a standard Windows cmd terminal (aka Shit).  To get a nice Unix-like terminal we'll install Git for Windows which has a nice MinTTY terminal that acts similar to xterm.

Continue on in HowTo: Set up Win 10 as a Unix-like Dev Workstation until you get PuTTY/Pageant set up and Git.

Once you have Git installed you will have Git Bash, which uses MinTTY, and is a pretty nice terminal that works well with msys.

What next?

Now you have a bare-bones terminal.

You need to set up your %HOMEPATH%\.bashrc and related dotfiles to really start customizing it to look and feel the way you want.

Check out my Github home dir to see an example of how I set mine up.

References

qt-project.org has nice info about MinGW and MinGW-W64, including info RE threading and exception models, pros/cons of each, etc.

EDITS

14.Aug.16 - Removed instructions for installing old school mintty; I now suggest using Git for Windows since their mintty is much newer/nicer.

27.Jul.16 - Fixed /etc/fstab mount point.  Added empty C:\msys\mingw folder so that /mingw is visible to filesystem search utilities.

06.May.16 - Updated based on new MinGW-W64 version. No longer need to manually create MSYS shortcut.

23.Jun.15 - Removed Win 8.1 specific stuff.  Updated instructions per new MinGW-W64 v5.1.0.  Confirmed that updating the toolchain is not necessary, at least for v5.1.0 and removed that part of the instructions. Moved msys to C:\msys

11.May-15 - Updated for Windows 10. Added Windows home directory mount. Moved MSYS directory inside MinGW-W64 as we no longer need easy access to it with the Windows home diretory mounted.

17.Sep.14 - Added some clarifications. Added mingw64 toolchain update.  Added references.

Friday, March 13, 2015

Install php-yaml on Windows 8.1

Install php-yaml on Win 10 (or 8.1)

Related to my previous post Install PHP 5.6 on Win 8.1 x64, I needed to work with YAML from PHP.  The instructions for how to do this are confusing, at best.

Simplified instructions:


  1. Go to http://pecl.php.net/package/yaml
  2. Download the zip file for the latest version (as of the time of writing this, 1.2,0).  There is a little Windows Icon and the word DLL is linked to the zip.
  3. Download the 5.6 Thread Safe (TS) x86 version
    1. Thread Safe
    2. x86 (32-bit), NOT the x64 (64-bit), since we're running 32-bit PHP
  4. Copy yaml.dll to C:/dev/php (or wherever you installed PHP)
  5. Copy php_yaml.dll to C:/dev/php/ext (or the ext directory under your PHP install location)
  6. Edit C:/dev/php/php.ini
    1. Add this line:
      extension=C:/dev/php/ext/php_yaml.dll
  7. Confirm that it works:
    1. php --re yaml

Saturday, November 8, 2014

Install PHP 5.6 on Win 8.1 x64

Install PHP 5.6 on Win 8.1 x64


Following the instructions here http://windows.php.net/download/

I downloaded the VC11 x86 Thread Safe (32-bit), even though I'm on 64-bit Win 8.1

The 64-bit is experimental and oh well, I don't need PHP to do super crazy number crunching anyway.

Installation instructions

  • Create dir C:\dev\php
  • Extract the zip contents into that directory
  • Add C:\dev\php to the system environment path
  • copy C:\dev\php\php.ini-development to C:\dev\php\php.ini

Set Time Zone

  • edit C:\dev\php\php.ini
  • Add this line:
    date.timezone = America/Los_Angeles

Change the time zone to match whatever yours is.  This example works for PST in the US.  To see all supported time zones go to http://php.net/manual/en/timezones.php

Get SSL working:

  • edit C:\dev\php\php.ini
  • Uncomment this line:
    ;extension=php_openssl.dll
  • And change the line to read this:
    extension=C:\dev\php\ext\php_openssl.dll

Enable CURL:

  • edit C:\dev\php\php.ini
  • Uncomment this line:
    ;extension=php_curl.dll
  • And change the line to read this:
    extension=C:\dev\php\ext\php_curl.dll

Enable XSL (for PHPDoc):

  • edit C:\dev\php\php.ini
  • Uncomment this line:
    ;extension=php_xsl.dll
  • And change the line to read this:
    extension=C:\dev\php\ext\php_xsl.dll

Install XDebug:

  • Download from here:
    http://xdebug.org/download.php
    • Make sure you pick the one that matches the version of PHP you installed.
    • For example I got "PHP 5.6 VC11 TS (32 bit)"
  • Windows will tell you this type of file is not safe.  Duh.  Save it anyway
    • Save it to C:\dev\php\ext
  • edit C:\dev\php\php.ini
    • THIS IS NOT AN ORDINARY EXTENSION
    • Add it by adding this line at the bottom:
      zend_extension="C:\dev\php\ext\php_xdebug-2.2.5-5.6-vc11.dll"
    • Of course make sure the filename matches the one you downloaded.

Install Composer


Download Composer, it should work fine now:

Thanks to:

http://php.net/manual/en/openssl.installation.php Alan 3 years ago added some great tips on how to do this very thing.

Wednesday, September 17, 2014

Configure MinGW-W64+MSYS to use PuTTY Plink/Pageant

Configure MinGW-W64+MSYS to use PuTTY Plink/Pageant

I forgot to document this last time so I figured I'd post to save anybody the trouble of figuring out how to do it again.

Install Putty/Pageant/Plink


For purposes of this document we assume you installed Pageant into:

C:\tools\PuTTY\pageant.exe

Load SSH keys into Pageant


Start Pageant and load in your SSH keys.  (Quick explanation here).

Configure Windows System Environment Variables


Windows key => "Environ" => Edit the system environment variables => [Environment Variables...]

Look in System variables, modify these if they exist, otherwise add them:

GIT_SSH = "C:\tools\PuTTY\plink.exe"
SVN_SSH = "C:\tools\PuTTY\plink.exe"

Click [OK]

Open new MinTTY (or other MSYS terminal)


Close any MSYS terminal or MinTTY that you have open, and open a new one.

Confirm that everything should be working:

bash$ env | grep -i ssh
GIT_SSH=C:\tools\PuTTY\plink.exe
SVN_SSH=C:\tools\PuTTY\plink.exe

Use PuTTY to connect to the host you want to access


For each new host you must use PuTTY to connect.  This is especially important when you are using git or svn or something that doesn't directly access ssh.  If you haven't yet connected to that host with PuTTY, the connection will probably fail.

Example first Github clone


PuTTY => New Session

  Hostname: github.com
  Click [Open]

You'll get a message from Pageant, do you want to save this key?  Click [Yes]

Now you should be good to go,  you can close the PuTTY window, and go back into MinTTY and try to git clone.

$ git clone git@github.com:joyent/node
Cloning into 'node'...

Obviously you should clone a repository to which you have access.  Everything should work.

Monday, September 15, 2014

Strawberry Perl on MinGW-W64 + MSYS

Strawberry Perl on MinGW-W64 + MSYS

Following up to my bare bones MinGW-W64 + MSYS install, I've found it to be convenient to install a version of Perl that you can actually keep updated easily.  The Perl version that comes with MSYS is really old.

Install Strawberry Perl

I'm using Strawberry Perl from http://strawberryperl.com

Download and install it.  I installed to C:\perl

Modify $PATH via ~/.bashrc

Add the following code to your ~/.bashrc assuming you installed to C:\perl

# Force Strawberry Perl to the front of the path
if [ -x /c/perl/perl/bin/perl.exe ]; then
export PATH="/c/perl/perl/bin:$PATH"
fi


Exit your shell and start a new shell.

Make sure it worked

ross@win$ which perl
/c/perl/perl/bin/perl.exe

Success!  Enjoy your modern Perl.

Saturday, May 17, 2014

Review: 2014 Razer Blade 14"

So my new 14” Razer Blade arrived a few days ago and I’m really enjoying it.

All in all, it’s a very nice machine.  The screen, when looking at apps that work for high DPI, and/or looking at pics/video that actually use the entire resolution (very hard to find) looks AMAZING.

Some games I installed actually support the insane 3200 x 1800 resolution, and WOW they look just incredible.  The graphics card in this machine doesn’t act like a laptop graphics card, it is VERY GOOD.

There are some caveats.

  1. The screen resolution is SO HIGH and the screen itself is only 14” so the DPI is VERY VERY high.  It’s so high that many Windows apps aren’t yet prepared to handle it, and when you see them on the screen, they are the size of a proverbial quarter.
    1. There are ways to get around this with each app, which involves configuring Windows to launch these apps in compatibility mode, but it requires work.
    2. There is also a “Magnifier” app to let you zoom in, but that is annoying to use.
  2. It’s on significant back-order.  It took 2 months for mine to arrive.  My buddy ordered one at the same time and he was just informed that his delivery got pushed back at least 1 more month.

RE Windows 8.1

  1. It’s not as scary as people made it out to be.  They sort of added back the concept of the start button, and the vast majority of stuff I do is in desktop mode which works well.
  2. My primary browser is Chrome, and it doesn’t work great at this high DPI.  It looks like shit really, and it only works in compatibility mode at the moment.  Google is aware of the issue and supposedly working to fix it, but who knows how long that will really take.  IE looks great, but it’s IE, which is notorious for its insecurity and so I refuse to use it except to download Chrome.

My only real complaints:

  1. After getting used to the Track Pad on the MacBook Pro, I think every other track pad is going to piss me off.  This one is no exception.
    1. It isn’t as sensitive as the MacBook Pro
    2. It doesn’t support single-finger-click without picking your finger up and tapping it back down; that is one of my favorite features of the MacBook Pro track pad.
    3. The left/right mouse click buttons are so close to the edge of the device that it’s challenging to use them when I’m sitting on the couch and actually using the device as, you know, a laptop.
      1. Not an issue when sitting at the desk, which is mostly what I do.
  2. Managing all the DPI settings for every app I install is annoying.
    1. However you really only have to do this once, when you install, and then it’s done.
    2. Also going forward more and more apps will have high DPI support that actually works.
      1. Mac went through this same thing when they released high DPI Retina display.  This display is even HIGHER DPI than that though, and so the problem is even worse in this case.
    3. In the long-run this won’t be an issue, but today it is.
  3. 8 GB RAM limit
    1. So far I haven't hit the limit, even though I've been running VMs and my IDEs simultaneously, but then again I haven't really been working with huge DBs etc that require a ton of RAM.  I expect 16 GB in a laptop these days, so the 8 GB limit makes me nervous.  I'd have put 32 in here if that had been an option.

Not sure I’ll really use the touch screen all that much, but my daughter loves it.  She hates the idea of a mouse, she’s so used to her iPad, iPhone, Android Phone.  Things should work when you touch them as far as she is concerned.  She likes surfing YouTube and Vube on my laptop now, which she refused to do on my previous laptops as they had no touch screen.

All in all, excellent job Razer!

This is a VERY SMALL laptop that I can easily travel with, and I haven't had to compromise on performance to get it.  It looks and feels amazing and it's a pleasure to work on it.